
How to Treat Hip Pain with Dr. Tan's Balance Method: A Three-System Case Study
What do you do when a leg keeps giving way and the patient can feel it coming? This case is about answering a wide map from a narrow place instead of adding a needle for every painful region: read each sick meridian on its own, stack the projections that land on the same bone, and know which pairing is the one that leaves the leg.
A woman comes to our clinic with right hip pain and a right leg that drops her without warning — or rather, with warning: she feels it coming before it happens. She rates the muscles 6 out of 10. Then she gives us a second number we did not ask for: 8 out of 10 for her mind, which is switched on from morning to night. Let's map it.
When a complaint runs from the hip down the thigh and across the trunk on the same side, you read every meridian crossing it before you commit to anything. Here that reading came back with five painful zones on three meridians — and the treatment turned on how few places you need to stand to answer all of them.
Patient Profile
| Patient | Woman, right-sided complaint |
| Complaint | Right hip pain, a right leg that gives way without warning, and pain across the trunk on the same side |
| Meridians involved | Spleen (SP) and Liver (LIV) on the leg, Liver and Gallbladder (GB) on the trunk, Gallbladder at the hip; on the trunk the pain sometimes drifted back toward Urinary Bladder (UB) |
| Tissue and depth | Muscle throughout, superficial — except the hip, which sat deep |
| Pain level | 6 out of 10 in the muscles; 8 out of 10 for the mental load |
| Approach | Local Balance across System 6, System 3 and System 2, with a Global Balance layer on top |
| Treatment side | Opposite side throughout — almost the entire local treatment on the left foot |
Why This Hip Pain Case Needed Three Systems
Five painful zones, three sick meridians, one side of the body. That is a wide map, and a wide map invites a wide treatment: a balancing meridian per region, a needle for each of them.
Here's the temptation: the hip is the part the patient names, so the hip becomes the treatment. It won't hold. The hip was one zone out of five, and it was also the only one sitting deep. Treat it alone and you leave the thigh, the flank and the ribs untouched; treat every zone as its own problem and you build four strategies where two would do.
What made this case worth writing down is the opposite move. Read the five zones as five separate sick-meridian questions, and they collapse onto two balancing meridians — both foot meridians, both on the opposite leg, both reachable from a stretch of foot you could cover with two fingers. One region refused to fit there, and that one region is where the third system came in.
The Treatment
Step 1: Map the pain
Right side throughout. Spleen (SP) from SP 12 down to SP 10.5 on the thigh. Liver (LIV) from LIV 11 down to LIV 8.5 on the same leg, and again on the trunk at LIV 13 to LIV 14. Gallbladder (GB) across the flank at GB 22 to GB 23, and at the hip at GB 29 to GB 30. On the trunk, the pain sometimes drifted back toward the Urinary Bladder (UB).
Then the tissue and the depth, which are two separate readings. Muscle everywhere, and superficial everywhere — except the hip. The hip sat deep, and it was the only zone that did.
And then the numbers. She gave 6 out of 10 for the muscles and 8 out of 10 for a mind that never switched off. Both of those belong in Step 1. The second one changed the treatment as much as the first.
Step 2: Pick the systems
Local Balance, and three systems rather than one.
Spleen balances to Spleen and Liver balances to Liver through System 6 — the same meridian answering itself, foot with foot. Gallbladder goes to Liver through System 3, the internal-external pair, also foot with foot and always on the opposite side. Run that over the Balance Method matrix and three sick meridians reduce to two balancing meridians: Spleen and Liver, both on the leg she was not complaining about. System 3 sets the side, and we kept the System 6 work on that same side, so the whole local treatment sat on one foot.
The Urinary Bladder drift on the trunk is the part that would not fit. No foot-with-foot pairing answers it at the level where it sat. System 2, the branching meridians, does: Tai Yin with Tai Yang, hand with foot, which puts the Lung (LU) meridian in charge of the Urinary Bladder. That is the one pairing in this case that leaves the leg, and it was chosen for exactly that reason.
Step 3: Needle
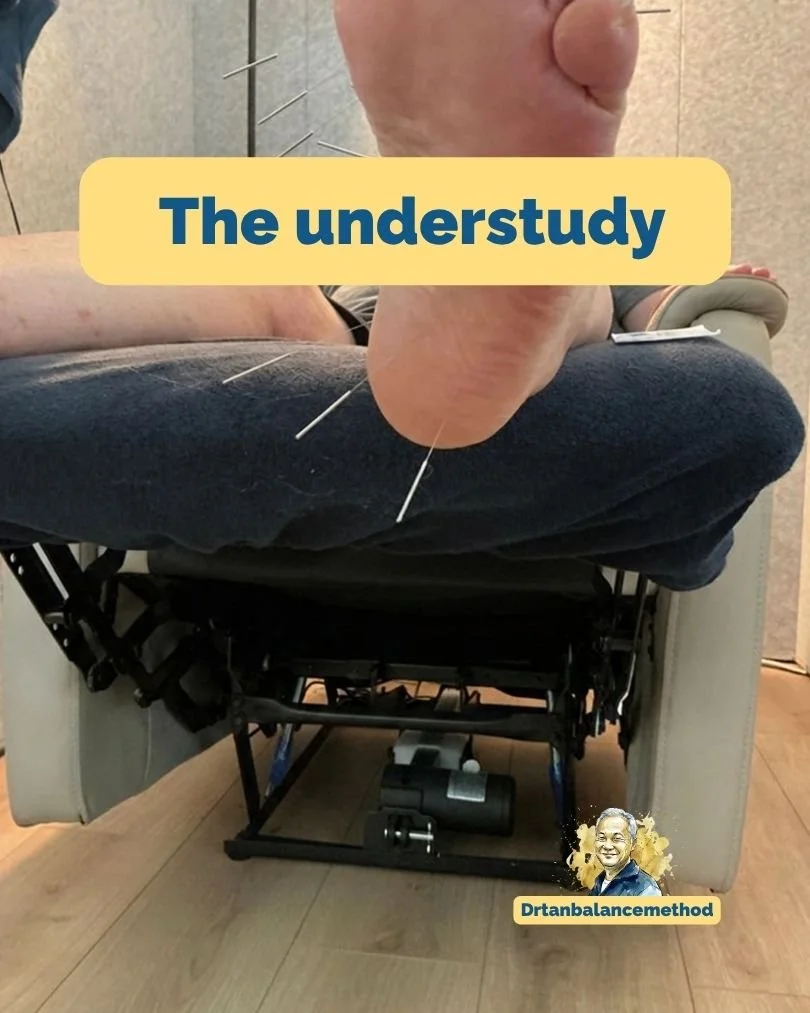
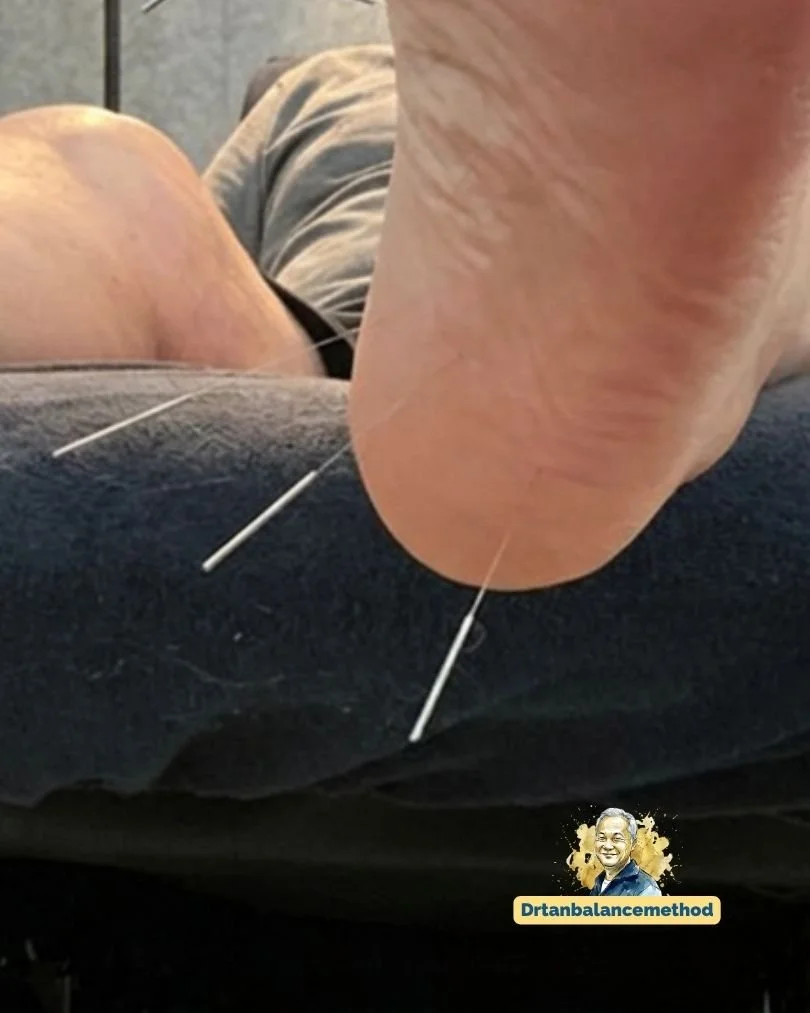
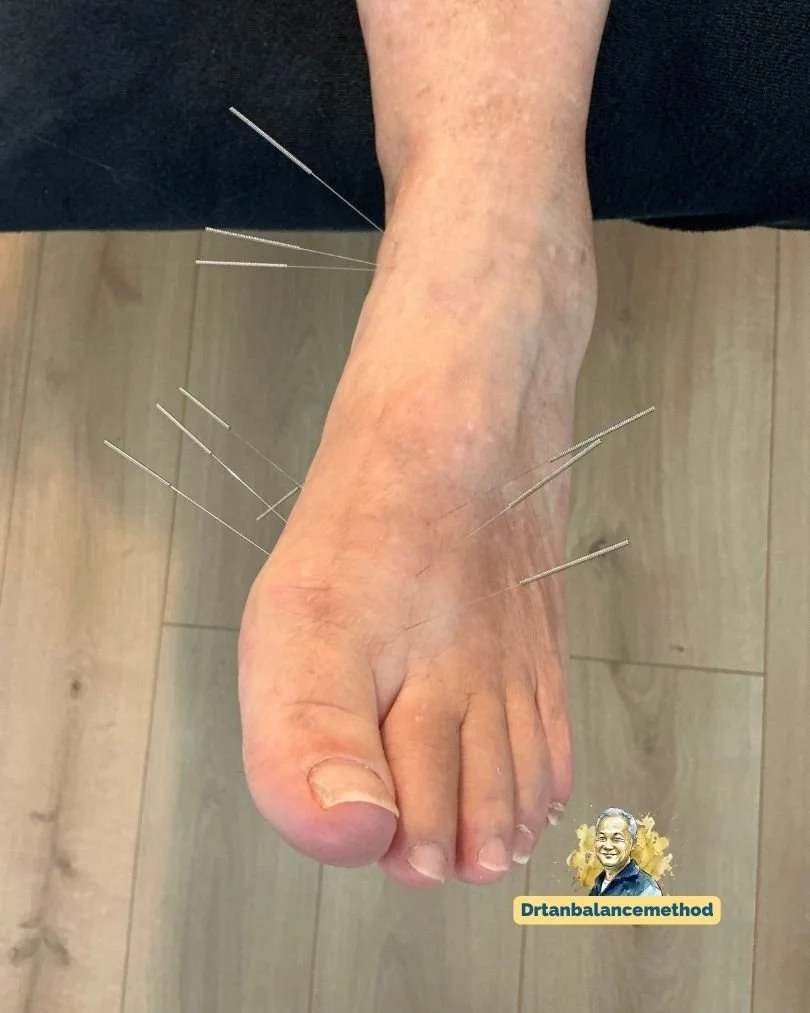
The left foot first, and two projections landing on the same bone.
The Small Leg Metatarsal Image folds the upper leg onto one small bone of the foot, which brought the Spleen thigh pain to SP 2 to SP 3 and the Liver thigh pain to LIV 2 to LIV 3. The Small Puppet Metatarsal Image puts head and trunk on that same bone — so LIV 13 to LIV 14 and, through System 3, GB 22 to GB 23 both come to rest at LIV 2 to LIV 3 as well. One stretch of foot, two different images, four painful zones answered.
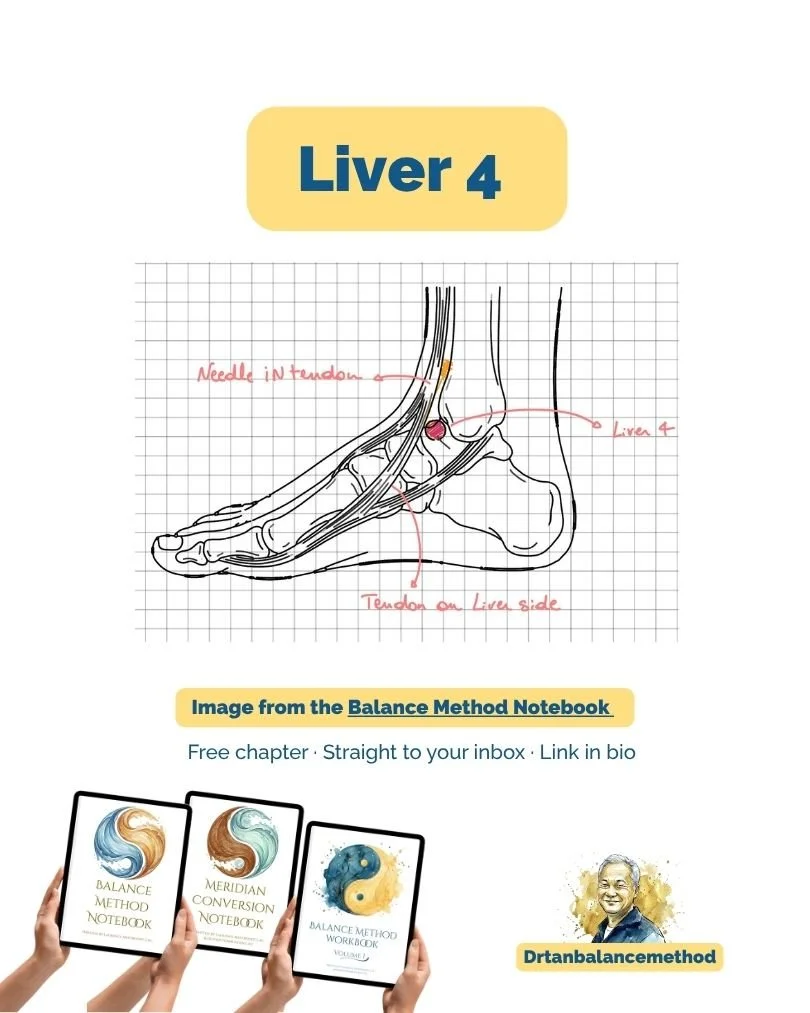
The hip could not use either image, because it needed a joint rather than a length of bone. There the reverse mirror does the work: on the leg, the ankle stands in for the hip joint. GB 29 to GB 30 on the right hip answered at LIV 4 on the left ankle. Named points gave us the neighbourhood; the ashi gave us the needle.
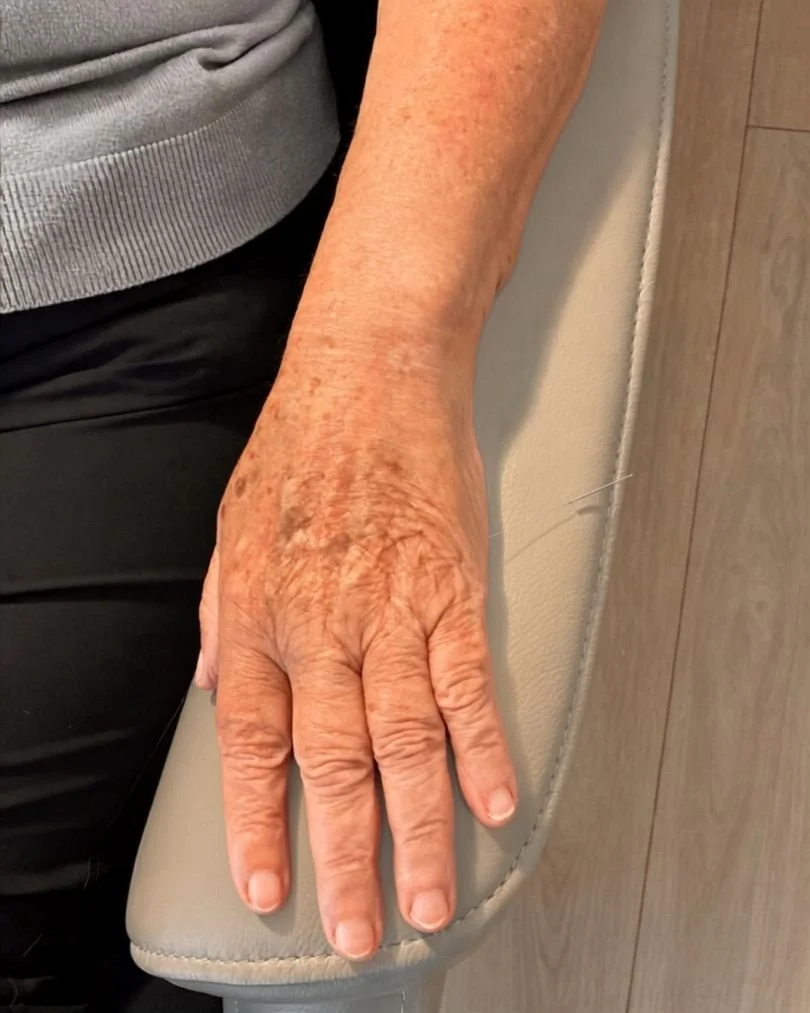
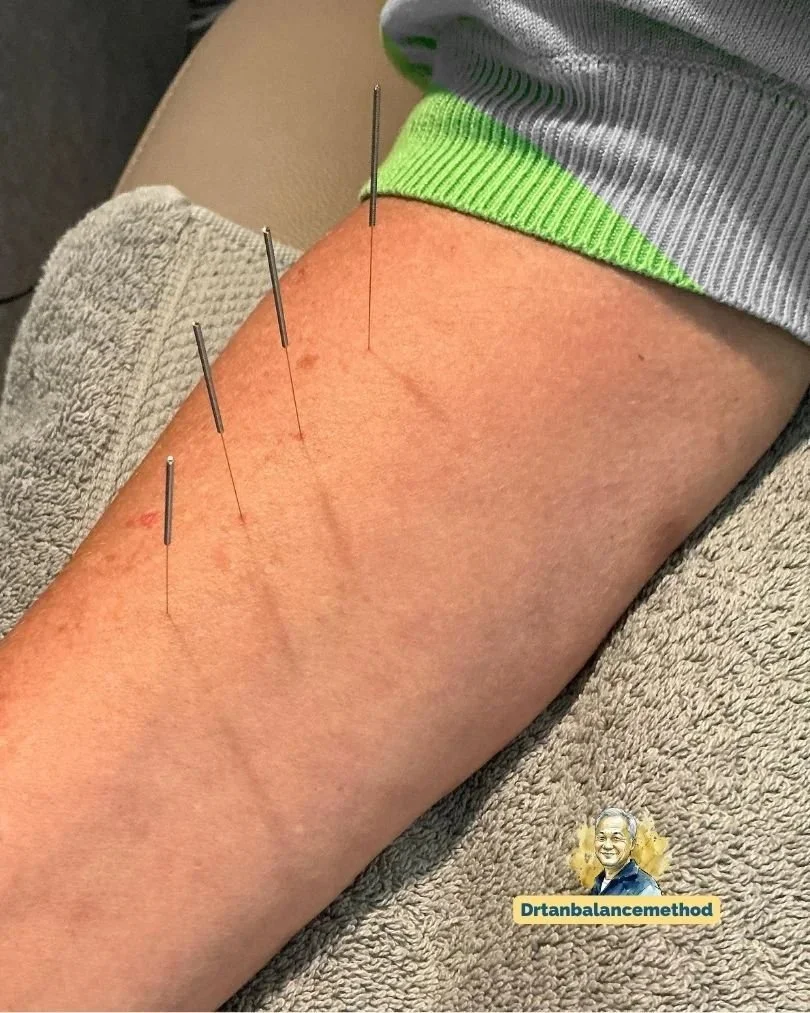
Then the forearm, for the drift the foot could not reach. Through the Direct Puppet Show Image the elbow stands in for the navel, so the Urinary Bladder at trunk level answers just below it: LU 5.5 ashi to LU 6.
Last, the layer that was not about a pathway at all. The picture was an excess picture in the muscles and in the mind at the same time, so we added a Global Balance on a Lung-Liver and Tai Yang pattern: that same Lung stretch, Small Intestine (SI) 3, Urinary Bladder through the small image, and Liver on the ashi. With a neurological work-up running in the background, the Kidney (Kid) brain zone on the foot went in alongside it.
The mental number was the first thing to move, and it moved while she was still on the table.
Outcome
The mental score dropped from 8 out of 10 to 4 inside the first session, and it settled at 2 over the course of the treatments. She also reported something we did not prescribe: she started looking for quiet on purpose, sitting in the sun and doing puzzles.
The muscles took longer and were never scored again. After two sessions they were calmer. By the fourth session the hip stopped giving way. We have no closing number for the body, and we are not going to supply one — what we have instead is the behaviour, which in a leg that drops its owner is the more useful measure anyway.
Eight sessions in total. She now comes once every two months, and at the time of writing the leg has not given way for four months.
Those are two different results and they moved on two different clocks: a mind that let go inside one session, and a leg that needed four. Reporting them as one downward line would describe neither.
The Insight: Two Images Can Share One Bone
Projection is usually taught one image at a time. You pick the region, you pick the image that carries it, you needle where it lands. That is correct, and it is also why a five-zone map feels like five separate jobs.
This case stacked them. The upper leg came down onto a small bone of the opposite foot through one image; the trunk came down onto the same bone through another. Different regions, different images, same few centimetres of foot. Once that overlap is visible, the question stops being how many meridians are involved and becomes how many places you actually have to stand.
The overlap is not a coincidence you get lucky with. It is a property of working with small images: a small image compresses a large region onto a short stretch of bone, so two large regions compressed onto the same stretch will meet. Checking for that meeting point before building a second strategy is the whole move.
What the overlap does not do is cover everything. The hip needed a joint-for-joint answer instead of a length-for-length one, and the Urinary Bladder drift needed a system that leaves the leg entirely. Stacking is a way to shrink the treatment, not a promise that one place will hold all of it.
What to Watch For With Three-System Cases
1. Treating the named region instead of the map
The patient says hip, so the hip gets the attention. Here the hip was one zone of five and the only deep one, which makes it the least representative part of the case. Ask the patient to point at every painful area, one finger each, and read them separately before deciding what the complaint is.
2. Letting one depth reading cover the whole case
Muscle and superficial across the thigh, flank and ribs; muscle and deep at the hip. Depth is a per-zone reading, not a per-patient one. Needle the hip answer at thigh depth and you have matched the meridian while missing the structure.
3. Forcing the whole treatment onto one limb
Two systems kept this case on the opposite foot, which is efficient and satisfying, and it is exactly the state of mind in which an awkward region gets quietly rounded into the tidy part of the plan. The Urinary Bladder drift did not belong there. When a zone will not fit the pairing you are using, that is information about the pairing, not about the zone.
Apply This in Your Practice
Check for a shared landing spot before you add a meridian. When several regions map to the same balancing meridian, run each one through its own image and see where it lands. Two images on one bone is a smaller treatment than two strategies, and you find it by looking, not by hoping.
Ask for the second number. This patient volunteered a mental score higher than her physical one, and it turned out to be the number that moved first. You do not need a questionnaire for this. Ask what the complaint costs her on an average day, and write down whatever she answers.
Know which pairings keep you in the limb and which one does not. System 6 and System 3 both keep foot with foot. System 2 is the branching pairing and crosses between hand and foot, which is precisely why it was the answer for a trunk-level Urinary Bladder problem that no leg point could reach at the right height.
Let an excess picture in the mind count as a finding. Muscles tight everywhere and a mind that runs all day is a pattern, not a mood, and it is a reason to weigh Local against Global Balance and add a global layer on top of the local work rather than a reason to needle harder locally.
Quick Reference: This Case
- Right side → SP 12 to SP 10.5 (thigh) · LIV 11 to LIV 8.5 (leg) and LIV 13 to LIV 14 (trunk) · GB 22 to GB 23 (flank) and GB 29 to GB 30 (hip), sometimes drifting toward Urinary Bladder
- Muscle throughout · superficial, except the hip, which sat deep · 6/10 in the muscles, 8/10 for the mental load
- Local Balance → Spleen and Liver by System 6 · Gallbladder to Liver by System 3 · Lung for Urinary Bladder by System 2
- Left foot, two images on one bone: Small Leg Metatarsal and Small Puppet Metatarsal → SP 2 to SP 3 and LIV 2 to LIV 3 for thigh, trunk and flank
- Hip by reverse mirror, ankle for hip joint → LIV 4 · Urinary Bladder drift by Direct Puppet Show Image, elbow for navel → LU 5.5 ashi to LU 6
- Global Balance, Lung-Liver and Tai Yang → that same Lung stretch, SI 3, Urinary Bladder through the small image, Liver on the ashi · plus the Kid brain zone on the foot
- Mental load 8/10 → 4/10 in session one, settled at 2/10 · muscles calmer after 2 sessions · hip stopped giving way by session 4 · 8 sessions in total, now once every two months · four months without the leg giving way
Note: Patient details have been adapted from comparable cases in our clinic to protect privacy. This post is for educational purposes only — for acupuncturists and interested professionals. Not treatment advice or a substitute for professional consultation.
Every System, Every Projection, Every Pattern at Your Treatment Table
Start with the free chapter and see how the reference works in the clinic.
Foundation · 600+ pages
Balance Method Notebook
The complete Local and Global Balance reference, hand-drawn for the treatment table.
Specialization · 500+ pages
Meridian Conversion Notebook
Beyond pathway treatment: calm the Shen, balance hormones, work with depression, addiction and insomnia.
Practice · 800+ pages
Balance Method Workbook
Work the 56 cases yourself before you read the answer, one map and one treatment plan at a time.
Free chapter · Straight to your inbox
Next Steps
This case applies foundational concepts from our pillar guides. To go deeper:
For the one-finger reading that opened this case: how to diagnose the sick meridian
For the pairings behind Step 2: the 6 Systems explained
For the images and the reverse mirror used in Step 3: Mirroring and Imaging in the Balance Method
For the Bladder at trunk level and the lumbar projections: Back Pain and Sciatica with the Balance Method
For a trunk complaint solved by finishing one plan instead of stacking images: our flank pain case study
For the palpation that led every needle here: how to find the ashi point
For the projections in this case shown on the table: our needling demonstrations
For every sick meridian and its balancing options in one place: the Balance Method matrix as a free PDF chart
To discuss cases with colleagues worldwide: the Practitioner Community
New to the terminology? See the Balance Method Glossary for every core term in one place.
