
How to Treat Flank Pain with Dr. Tan's Balance Method: A Multi-Meridian Case Study
What do you do when the pain runs along the flank and tightens with every breath, yet the lungs are fine? This case is about finishing the plan you started instead of reaching for a new one: map the meridians crossing the painful side, balance them from the opposite leg, then — when the first pass stalls — palpate in between and chase the ashi before you switch systems.
A 57-year-old woman comes to our clinic with left-side flank pain that catches with every deep breath. Not her lungs — the pain itself, tightening each time she draws air in. She rates it 7 out of 10. Let's map it.
When a complaint runs down the side of the trunk, you read every meridian crossing the painful strip before you commit to anything. Here four of them ran through it — and the treatment turned on how few of them we actually needed to needle.
Patient Profile
| Patient | 57-year-old woman |
| Complaint | Left-side flank pain, tightening with every deep breath |
| Meridians involved | Spleen, Liver, Gallbladder and Lung, all crossing the flank |
| Pain level | 7 out of 10; the breath is limited by the pain, not the lungs |
| Treatment side | Right leg, opposite the pain |
Why Flank Pain Is a Multi-Meridian Case
Four meridians cross the painful side. Spleen (SP) along SP 20 to SP 21. Liver (LIV) at LIV 14. Gallbladder (GB) across GB 22 to GB 23. Lung (LU) at LU 1 to LU 2. That is a complete map, and drawing it is the part every practitioner is trained to produce.
A full map invites a full treatment: a balancing meridian for each of the four lines, a needle for every one. The map does not actually ask for that. It tells you which meridians are involved, not how many of them you have to needle to move the pain — and that second number is almost always the smaller one. The work of the case is finding it, and then trusting it enough to stop adding.
The Treatment
Step 1: Map the pain
Left flank. Four meridians running through the painful strip: Spleen along SP 20 to SP 21, Liver at LIV 14, Gallbladder across GB 22 to GB 23, and Lung at LU 1 to LU 2. Each one gets its own sick-meridian reading, not one averaged impression of a painful side.
Step 2: Pick the systems
Spleen balances to itself through System 6, and it also carries the Lung line through System 1. Liver balances to itself through System 6. Gallbladder goes through System 3 — and that is the choice that set the side. System 3 for the Gallbladder put the treatment on the right leg, opposite the pain, so the whole session stayed on one leg.
Step 3: Needle
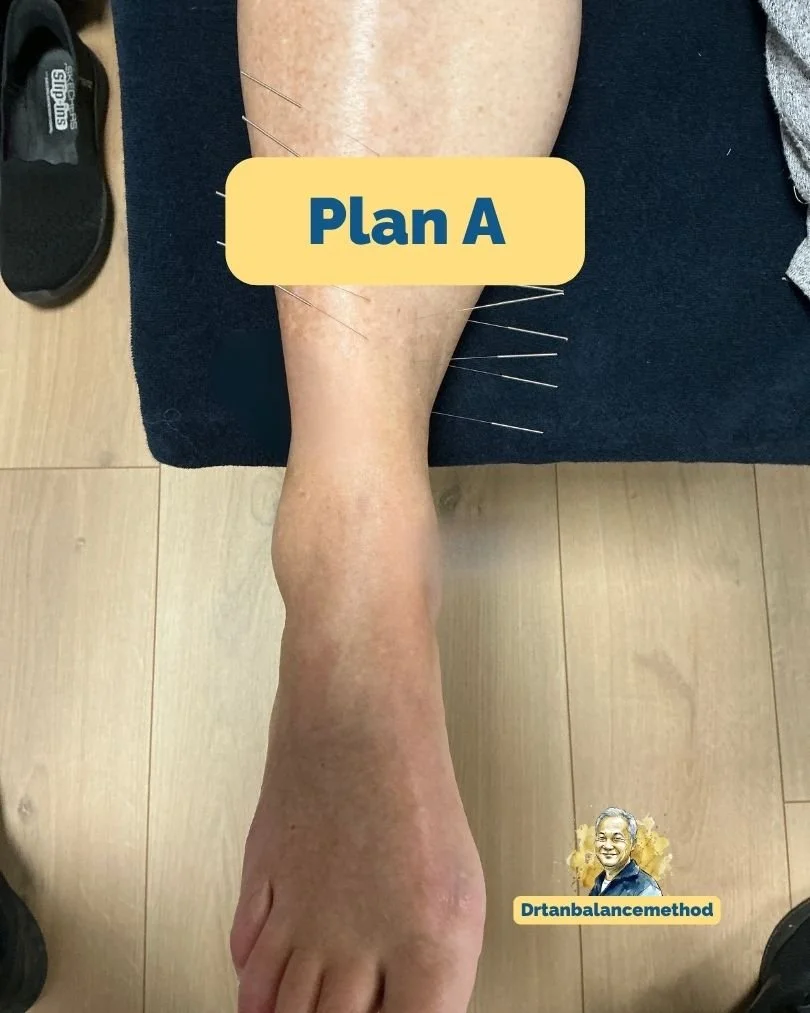
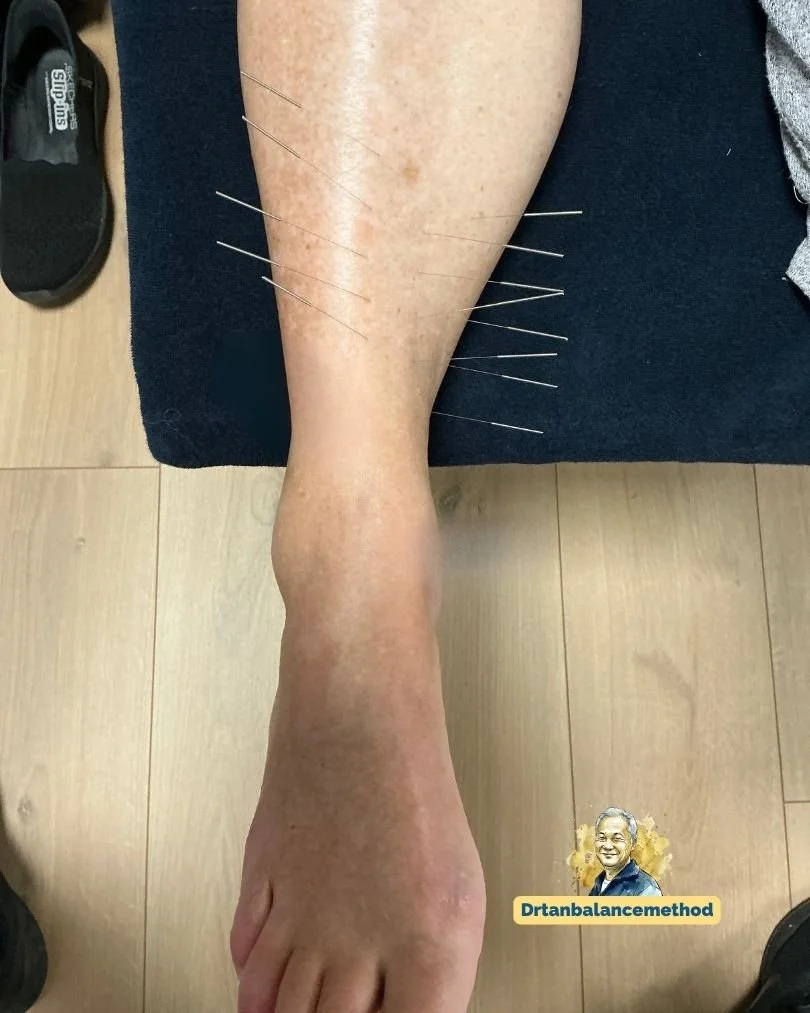
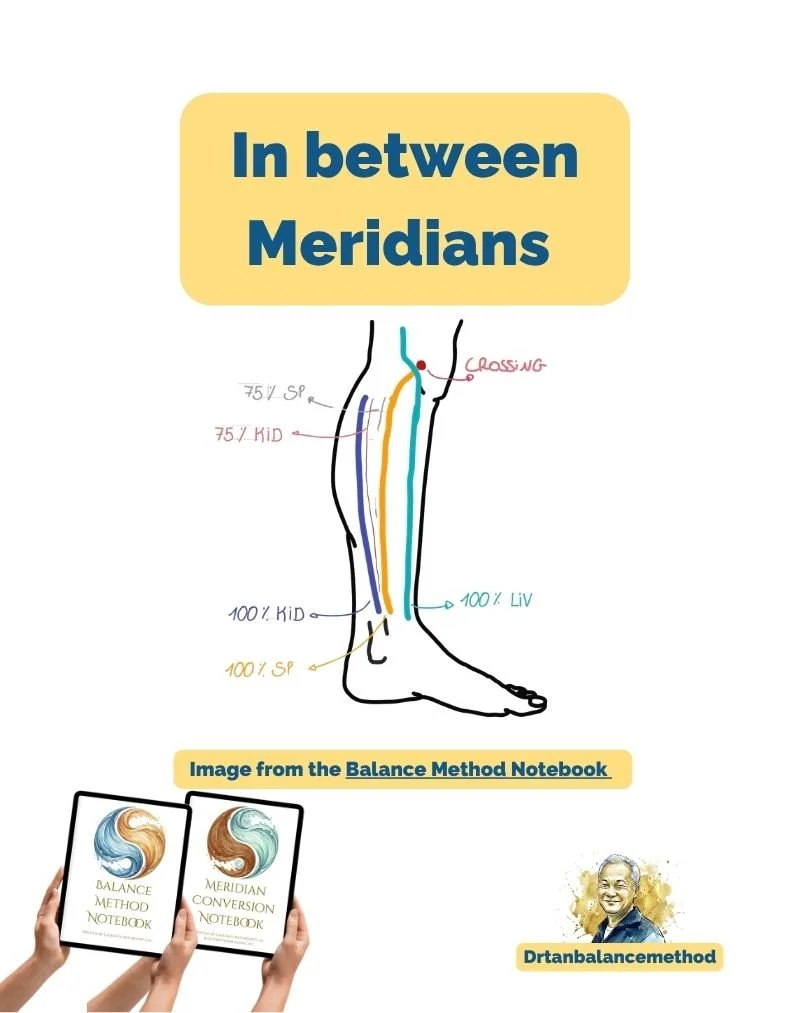
On the right leg, Spleen along SP 6 to SP 7 and Liver from LIV 4.5 to LIV 5.5. The flank did not present as separate points, so the leg was not treated as separate points either: alongside the two lines we needled in between them, on the ground between the Spleen and Liver meridians, palpating for the ashi rather than aiming for textbook locations.
We started with just Spleen and Liver. The pain dropped from 7 out of 10 to 5 — a real move, but not enough. Rather than reach for a new system, we stepped back and worked the ground we had already chosen: palpating between Spleen and Liver, we found a run of ashi and needled it. Kidney 1 sat in reserve the whole time, ready to open the ribcage if the breath did not free up. It did not come to that. After the in-between needling, two deep breaths — and she drew air in easily.
Outcome
Within the session the flank went from 7 out of 10 to 5 on the first two meridians, and the in-between needling freed the breath she had come in unable to take. That is the immediate result, and it is the only result this case reports.
Immediate relief on the table is one outcome; whether it holds between visits is another, and this case reports only the first. What the session did make clear is what it did not need: a second system. The answer was in the ground between the two meridians already chosen, not in a wider map.
The Insight: Finish the Plan Before You Switch It
The first pass got us halfway. The reflex at that moment is to change something big — a new system, a new region, a stronger point. This case went the other way. We stepped back, looked at what was already on the leg, and asked a plainer question: had we actually finished with it? We had not. The ground between Spleen and Liver still held ashi we had not palpated, and needling it was the rest of the treatment.
That question is easy to miss in the moment. A stalled result feels like a signal to change direction, when more often it is a signal to finish the direction you are already on. A little distance is what makes the difference visible: step back far enough to see the whole leg, and the next needle usually announces itself from inside the plan you already have.
Kidney 1 is the other half of the same discipline. It was the right fallback for a flank that limits the breath, and it stayed ready the entire session. But a fallback earns its place by being held, not spent. Reach for it only when the plan you started has genuinely run out — and here it had not.
What to Watch For With Multi-Meridian Cases
1. Reading the full map as a full needle list
Four meridians on the map do not mean four sets of needles. The map narrows the field; the number of lines you actually treat is a separate, smaller question. Treat the map as a shortlist, not a checklist.
2. Switching systems the moment the result stalls
A partial drop tempts you toward a new system before the current one is finished. More often the missing piece is finishing the approach you already chose — the in-between, the ashi you have not palpated yet — not a different system. Work it to the end before you change it.
3. Spending the fallback point early
A strong reserve point is easy to reach for the moment progress slows. Held, it keeps the treatment calm and gives you somewhere to go; spent too early, it becomes just another needle. Keep it in reserve until the first plan is genuinely done.
Apply This in Your Practice
Map wide, needle narrow. List every meridian crossing the painful area, then decide how few of them actually need a needle to move the pain. The map is the shortlist, not the plan.
Palpate the ground between meridians. When a complaint spreads across neighbouring lines, the zone in between them often holds the ashi that finishes the case. Treat the space, not only the points on either side of it.
When the result stalls, finish before you switch. A drop from 7 to 5 is information, not a dead end. Before you reach for a new system, look at what you have already placed and ask whether it has been worked to the end — the in-between, the ashi you have not palpated. Finishing the plan usually beats replacing it.
Keep a fallback, and keep it in reserve. Decide in advance what your backup is — here, Kidney 1 for a flank that limits the breath — and hold it. Reach for it only when the first plan has truly run out.
Quick Reference: This Case
- Left flank, worse with deep breathing → Spleen (SP 20 to SP 21), Liver (LIV 14), Gallbladder (GB 22 to GB 23), Lung (LU 1 to LU 2)
- Systems: Spleen by System 6 (and Lung by System 1) · Liver by System 6 · Gallbladder by System 3
- Right leg, opposite side · SP 6 to SP 7, LIV 4.5 to LIV 5.5, and in between the Spleen and Liver meridians, ashi-led
- First pass (Spleen + Liver): 7/10 → 5/10 · in-between ashi freed the breath
- Kidney 1 held in reserve to open the ribcage, not needed
Note: Patient details have been adapted from comparable cases in our clinic to protect privacy. This post is for educational purposes only — for acupuncturists and interested professionals. Not treatment advice or a substitute for professional consultation.
Every System, Every Projection, Every Pattern at Your Treatment Table
Start with the free chapter and see how the reference works in the clinic.
Foundation · 600+ pages
Balance Method Notebook
The complete Local and Global Balance reference, hand-drawn for the treatment table.
Specialization · 500+ pages
Meridian Conversion Notebook
Beyond pathway treatment: calm the Shen, balance hormones, work with depression, addiction and insomnia.
Free chapter · Straight to your inbox
Next Steps
This case applies foundational concepts from our pillar guides. To go deeper:
For the diagnostic foundation: how to diagnose the sick meridian
For choosing between one region and the whole pattern: Global vs Local Balance
For the palpation that finished this case: how to find the ashi point
For the systems behind Step 2: the 6 Systems explained
For projection and opposite-side logic: Mirroring and Imaging in the Balance Method
For a multi-meridian complaint chased across systems: our leg and knee case study
For the complete system at the table: the full Balance Method matrix as a PDF reference
To discuss cases with colleagues worldwide: the Practitioner Community
New to the terminology? See the Balance Method Glossary for every core term in one place.
