Lingu Combo: Four Needles on the Hand for the Lower Back
Pain on one side of the lower back. Sometimes it pulls deep into the belly. Your patient points to it with one hand.
Dr. Tan's shoulder combo was worth a million dollars. The Lingu combo is the heart of the second one, built for exactly that back. Add Lu and Ht, and it covers both sides.
Locate It. Mirror It. Nail It.
Four points on the back of the hand. Three of them carry Master Tung names. In the Balance Method they're fragmented points on meridians you already know.
Ling Gu: LI 4.5.
Da Bai: LI 3.5.
Zhong Bai: SJ 3.5, between SJ 3 and SJ 4. A loose fist opens the space between the 4th and 5th metacarpals.
SI 4: the fourth needle, and the one that brings UB into the combo.
The Hunt: Palpate each area and let the patient guide you. The Ashi is where they tell you it's painful under pressure. That's where the needle goes.
Why the Hand for the Lower Back?
Imaging: The puppet metacarpal image, projected onto the metacarpal bone. The knuckle is the navel line. From there the bone runs down the lower back, and the wrist is the bottom of the lumbar spine. The stretch where these four points sit is the lower back.
System logic: SJ balances GB. SI balances UB. Both work on the opposite side, which is why the combo goes on the side opposite the worst pain. LI doesn't balance UB or GB directly. It's there for pain that radiates deep into the abdomen, to the Kidney.
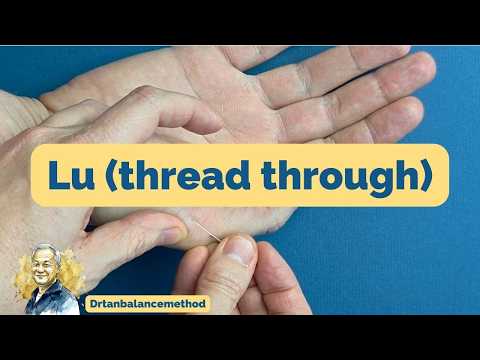
The full combo: Add Lu 5–6 Ashi and Ht 3–3.5 Ashi on the other arm. Lu balances UB and Ht balances GB, through System 2 and System 4. Between them they cover both sides of the back, and both project onto L2 to L5. Want to see the full combo in a real patient? Read our multi-meridian lower back case study.
Why it's worth two million: Lu and Ht give you a big, muscular projection. The hand points are distal and sensitive, they give strong Qi, and they bring joint and tendon tissue. Put muscle, joint and tendon together and you've covered whatever that lower back is made of.
The Protocol
Side: Lingu combo opposite the more painful side. Lu 5–6 and Ht 3–3.5 go on the other arm.
Depth: Anatomic Structure Similarity. Needle at the same depth as the pain, for every needle in the combo.
Retention: 45 minutes.
The Game Plan: Needle Lu and the Lingu combo first, then recheck. If the pain is gone, leave Ht out. If there's no GB in the picture, leave Ht out too.
The Confidence Trick
The #1 reason practitioners fail with this combo? They use it outside its range. It covers L2 to L5 on UB. It isn't built for the sacrum, and it does nothing for pain sitting on Dumai.
The Pro Move: Make the patient point before you needle. If they put a hand across the lumbar band, use this combo. If they put a finger on the sacrum or on the midline, you need something else.
The Win vs. The Fail
✅ The Win: The patient feels less back pain straight away.
❌ The Fail: The combo goes on the painful side, Ht gets added by reflex, and the pain turns out to sit on the sacrum.. That's the wrong side, an extra needle and the wrong target.
The bottom line: four needles on the hand, one band across the back.
Try It This Week
The next patient who draws a band across the lower back with both hands: go to the hand opposite the worse side. Four needles, then add Lu.
Have them bend before you reach for Ht.
Not sure which balancing meridian fits your patient? Keep the free Balance Method Matrix PDF next to your table.
Want to compare notes with other practitioners? Join the Balance Method community.
New to terms like Ashi or Anatomic Structure Similarity? You'll find them in the Balance Method Glossary.
This demo is for educational purposes only, created for acupuncturists and trained BM practitioners. Needling techniques should only be performed by licensed professionals. This content is not treatment advice and is not a substitute for professional training or clinical judgement.